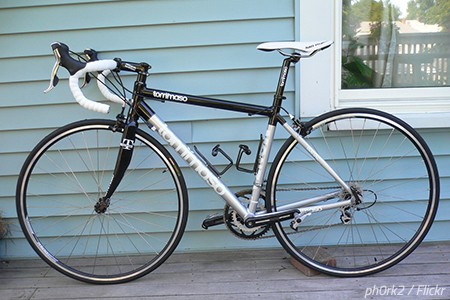
 If you’ve decided to do the packing yourself in order to save some money, then you may be wondering how to pack your bicycle so that it remains intact throughout the long-distance move.
You don’t wish to sell your bicycle or gift it before moving away simply because it’s a very nice bike, and you love it, and you wish to continue to enjoy it in the new place.
But unlike a local move where you can just park the bike inside the rental truck, a cross-country move performed by professional movers can hide a few risks of damage to your two-wheeler… unless it’s well protected for the road and safely packed into a sturdy box.
Read on to learn how to disassemble partially your bicycle, how to protect its most vulnerable areas, and how to box it safely so that it reaches the new destination in perfect condition.
Here’s how to pack a bicycle for moving:
Step 1. Prepare the packing materials
To pack your bicycle for shipping, you’ll need to prepare the right packing materials, of course. Most of them are standard packing supplies but there are also some special ones that you’ll need to get from the local bike shop.
Here’s what you’ll need to pack a bicycle for moving:
- 1 bike box
- 1 medium cardboard box (standard)
- 10 tube protectors made of foam
- 1 fork protector
- 10 zip ties
- Bubble wrap
- Wrapping paper
- Packing tape
Visit a good bike shop in your city and get a bike box – a big and sturdy cardboard box that will protect your bicycle on the road. Make sure you know the size of your bike beforehand. Also, you should be able to get a fork protector and foam tube protectors from there.
Step 2. Prepare the bike disassembly tools

Your local bike shop should have everything you need for packing your bicycle for moving.
To pack your bicycle in a bike box, you’re going to have to disassemble it partially, otherwise, it won’t fit inside the cardboard container as it is. Therefore, you’ll need to have the right tools for that partial disassembly.
- One set of hex wrenches (3, 4, 5, 6 and 8 mm)
- Torque wrench
- Pedal wrench (15 mm)
- A pair of pliers
Luckily, most of the tools you’ll already have as part of the bike’s basic repair kit. But if you don’t have any of the required tools, then be sure to get them when you visit your local bike store.
Step 3. Give your bike a good wash
The first step is to clean well your bicycle with water and a soft rag (or sponge) as you won’t want to transfer any dirt and grime to the new home. Pay special attention to the tires and the chain as well.
While cleaning your bike for shipping, inspect it carefully for any signs of damage or excessive wear. Should you notice anything, remember to have it checked out and fixed after the move for your own safety.
Step 4. Remove the pedals
Now it’s time to disassemble your bike partially so that it can fit in the box. Use the next few steps to prepare your bicycle for moving.
Use the pedal wrench to remove both pedals from the bike. To unscrew the right pedal, turn it counterclockwise. To unscrew the left pedal, turn it clockwise.
Wrap both pedals in packing paper, then place them into the regular packing box.
Step 5. Detach the seat and seat-post
Loosen the seat-post and remove it together with the seat. Pack them as one unit, use wrapping paper to give them better protection during the move, then use tape to secure the bundle.
Pack the seat-post and the seat into the same cardboard box in which you packed the pedals.
Step 6. Remove all bike accessories
It’s a good idea to remove all accessories from your bike to keep them from getting damaged during the haul. If your bike is equipped with a bike computer, then dismount it and pack it either in its original box or wrap it up in bubble wrap and place it in the parts box. Take down the computer mount as well and pack it safely.
Mirrors, bells, and other small accessories should also be removed and packed separately in soft wrapping paper to stay protected during the house move.
Step 7. Remove the front brake

You’ll need to remove the pedals so that the bicycle can fit into the bike box.
Next, you’re going to have to remove the front brakes of your bicycle as a preparation step to taking out the front wheel. This step can be a bit tricky, so pay close attention to how it’s done.
Remove the front brake from the fork (in the case of side-pull brakes), then reattach the nut and secure the entire unit in packing paper and tape. Leave the cable as it – don’t take it out because you can have a hard time re-adjusting it after the move.
Take out the side of the bike brake that is fixed to the cable (in the case of linear-pull or cantilever brakes), then secure everything with packing paper and tape.
Step 8. Remove the handlebars
Removing the handlebars is a necessary step when packing a bicycle for a move. Here’s how it’s done:
Unscrew the step bolts to open up the stem and release the handlebars, then position back the stem bolts and leave the step on the bike. If the stem and the handlebars can be removed as one unit, then do so.
Place the handlebars (and the stem in some cases) on the floor – you’ll need to secure it when packing the bicycle into the box.
Step 9. Remove the front wheel
The next step is to remove the front wheel – a fairly easy task that should only take a minute or so. All you have to do is unscrew the front wheel bolts and you’re done. Instead of regular bolts, you may have quick-release bolts, which will make it even easier for you.
Take out the front wheel carefully and set it aside for now. Next, position the fork protector that you got from the bike shop earlier. The fork protection block is very important because it will keep the fork structure from getting damaged (usually bent out of shape) during transport.
Step 10. Deflate the tires half-way
Finish the bike disassembly by deflating the tires approximately half-way. This step will serve two distinct purposes: 1) it will conserve the tires as they won’t be inflated at maximum pressure during the long haul, and 2) it will enable the bicycle to fit better into its transportation container.
Top 20 packing tips for moving
Step 11. Secure the rear derailleur

The rear derailleur is the most delicate and fragile part of your bicycle.
The rear derailleur is the most delicate and fragile part of your bicycle, so you need to protect it really well against any shocks or vibrations during transport. There are 2 quick steps to protect the rear derailleur against accidental damage:
- Shift the chain into the small chain-ring and the largest rear cog.
- Wrap the rear derailleur in bubble wrap (together with the chain, of course), then fix the bundle in place using zip ties or packing tape.
Step 12. Protect the bike frame
Position the foam tubes around and along the frame of the bike, making sure you don’t leave any metal parts exposed. Then, secure them with zip ties or just packing tape.
If you couldn’t find suitable foam tubes, then you can use bubble wrap instead with the same purpose – to protect the metal surfaces of your bicycle against scratches, paint chips, or dents. Don’t skimp on protective materials and use as much soft padding as possible to ensure zero damage to your prized bike.
Step 13. Attach the front wheel to the frame
First of all, wrap the crankarm of the left pedal with bubble wrap, then secure it with tape. Secondly, lay the bicycle on the ground so that the non-chain side (the left side) faces you. Then, position slowly the detached front wheel in a way that the protected left pedal crankarm gets between the wheel spokes. Ensure that the crankarm and the wheel rim are not touching.
Finally, use zip ties to tie securely the front wheel to the left side of the bike.
Step 14. Protect the handlebars
When packing a bicycle for shipping, you’ll also need to secure the handlebars – the last packing step before you transfer the protected bike into the box.
In the case of flat handlebars, your best chance is to secure the handlebars onto the top frame of the bike. Each bike part should be sufficiently padded so that no direct metal-to-metal contact is possible. Whenever needed, add more bubble wrap or another padding material to serve as extra cushioning. Then, tie the handlebars to the bike frame using zip ties.
In the case of dropped handlebars, you may have to play a little bit with the best position for them onto the bike frame – just use your best judgment and don’t bend or twist any cables in the process.
Step 15. Put the bike into the box

If you feel nervous about disassembling your bicycle by yourself, get expert help.
The final step to packing a bicycle for moving is, of course, to transfer the padded and secured bike into the special bike box.
Get a helper for that final step, if possible. When positioning the bike inside the box, make sure nothing is loose or moving inside. Fill in any empty gaps with newspapers or pieces of clothing to immobilize the padded bicycle. Ultimately, all bike parts need to be secure, with nothing rattling or shaking or moving inside the box.
When you’re done, tape the bike box closed and label it properly. Write FRAGILE onto the cardboard container. Also, secure and close the cardboard box with the bike accessories, seat and seat-post, and pedals.
However, if there’s enough space inside the bike box, then it’s best to pack inside it the bike accessories and detached parts instead of moving them in a separate box.
Packing a bike for moving is not overly complicated… but it’s definitely not as easy as packing books, for example. So, if you feel like you won’t be able to handle that packing task on your own, get professional packers who’ll know what to do.
The post How to Pack a Bicycle When Moving Long Distance appeared first on The Moving Blog.


